
Green Screen Video Techniques & Tips
Shooting on Green Screen allows you to have a lot of flexibility in post-production. You can be at our studio in Toronto and make it look you’re in the middle of the Sahara desert! In some cases, green screen studios can be a more cost-effective option for traveling to other locations. They can also allow for a lot of animation and crazy graphics to take place.
Lighting for Green Screen
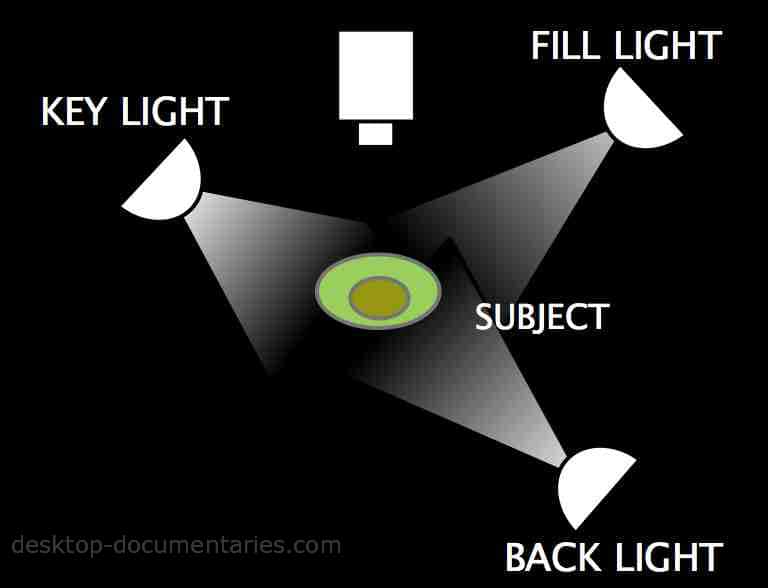
It’s really easy to throw up a green screen backdrop and get a recording. When you go into editing, you may notice your green screen isn’t disappearing as easily as you’d like. What people don’t realize is that lighting a green screen as evenly as possible is very important. You need to avoid shadows wherever you can so that the background is easily removed. It’s also important to note that you need to light the backdrop and the subject (i.e., the person on camera) separately. If you’re looking to light the backdrop, use some diffused softbox lights. Suppose you’re lighting the subject use a three-point lighting system! The three-point lighting system consists of a key light, fill light, and a backlight. The Key Light acts as the main source of light to highlight the subject and is typically the strongest light of the three. The fill light is used on the opposite side of the key light to remove shadows cast by it. Finally, the backlight is used to separate the subject from the background, so they don’t look like they’re one with the backdrop!
Maintain correct distance between backdrop and subject
This is one of the video production world debates about the “correct” distance between the backdrop and the subject. Several sources indicate that the ideal distance between a green screen backdrop and the subject is 10 feet or about 3 metres. The distance is truly dependent on how wide of a shot you’re trying to get. Our suggestion is to experiment with what works with your given environment. If you’re in a smaller studio, a 6ft separation may not be a feasible option. B&H Photo Video suggests: “While there’s general agreement about at least 4-6ft background to subject distance, the reality is, further is better to control the spill of chroma light bounced onto the subject which would result in a dark matte line around them once it’s keyed.”
Keep it blurry in the camera
When you’re filming on a green screen, it’s important to turn off the in-camera sharpening as it makes it difficult to get a clean edge between your foreground and your green screen. The in-camera sharpening improves image quality, but it also brings out any imperfections and noise on the green screen. This, again, makes it more difficult to obtain a clean edge. This isn’t Director of Photography’s preferred method of filming, as it makes their job harder as it is difficult to focus. However, in terms of the chroma keying process, it’s best to shoot without sharpening.
Resolution and Framing
It’s important to film your green screen production in the highest resolution. This is because the more detail you can capture, the cleaner your footage will look after keying in post-production. It’s to get a really tight shot as well. Since you’ll be dealing with the footage in post-production, you don’t need to concern yourself with the typical “safe areas” that are normally cut off by monitors and televisions. You can maximize the resolution but tiling th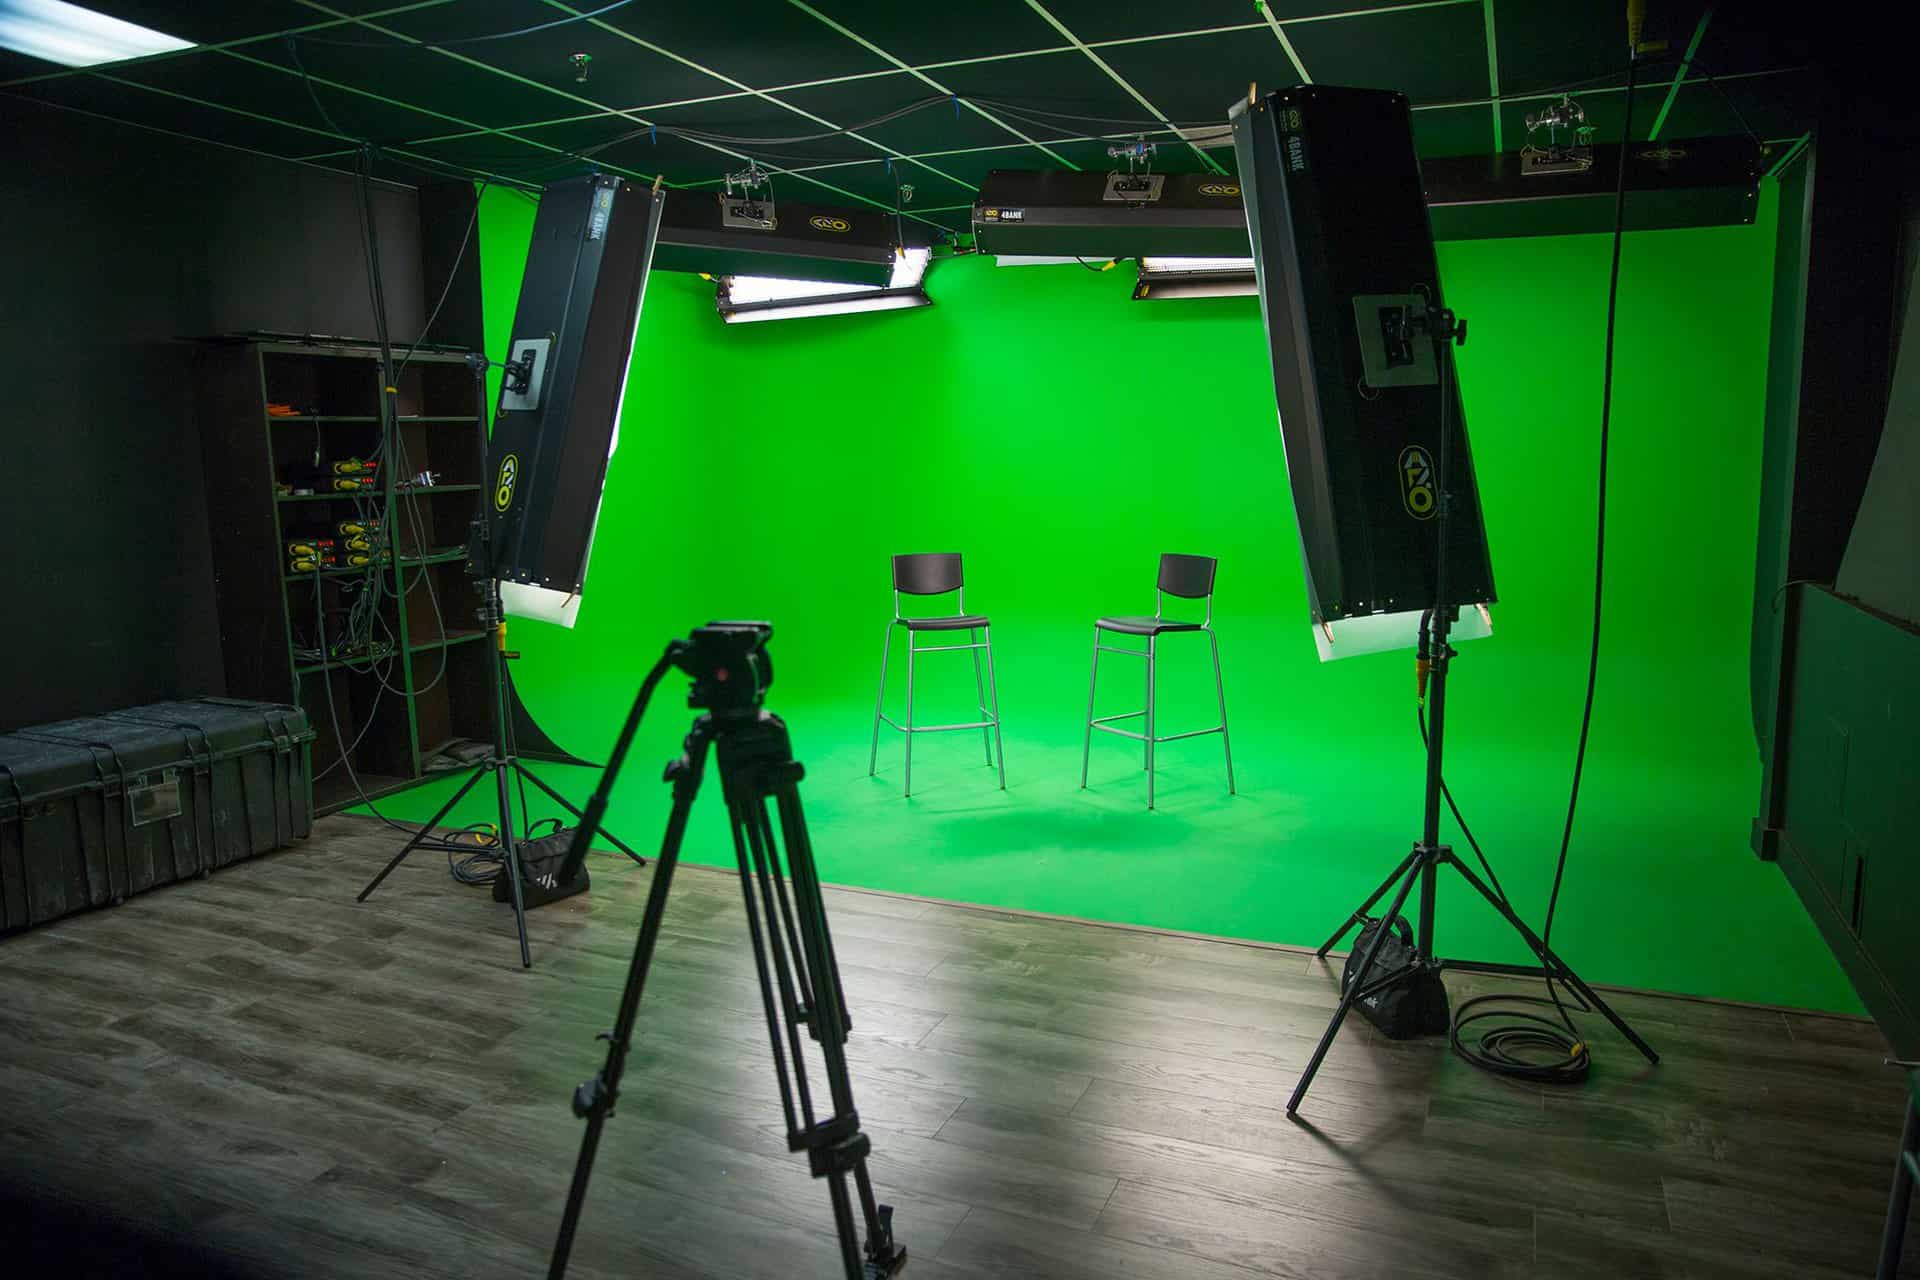 e camera 90 degrees when shooting subjects that are standing. If you’re shooting a green screen on paper backdrop at home, make sure that you frame so that the whole background is green. Once we start to see your furniture, it makes it harder to pull the background out.
Blue or Green?
Truthfully, Green is a more popular choice among video production professionals everywhere. The reason being is that green provides a brighter channel and has less noise than blue. Green is also the furthest away from human flesh, as it’s rare that people have a green undertone. In general, cameras also collect more green data than blue or red, making the keying process seamless with loads of information. That being said, there are places where blue may be a better option. For example, if the subject has blonde coloured hair, the green may spill and reflect off it, causing a mess in post-production. Blue, however, does less damage. The blue screen can be used in the small space where the subject has to be very close to the background, and you can’t avoid a lot of spill. We tend to find that casting a blue hue isn’t as unsettling as a green one. If you’re shooting outdoors, with tons of greenery in the foreground, you may consider blue as a quicker keying alternative.
At Key West Video, we know green screen. Our in-house green screen studio is built for clean and effective chroma keying. We can also pack it up and set up wherever you are. You can also use our high-definition post suite to key footage or create stunning graphics to deliver the final product.